Skin Detection Using OpenCV Python
What is Skin Detection?
- Process of finding skin-colored pixels and regions in an image or a video.
- Often used as a cue for detecting, localizing and observing targets containing skin(like faces and hands in an image)
- Plays an important role in human motion analysis and face detection.
(A skin classifier defines a decision boundary of the skin color class in the color space based on a training database of skin-colored pixels)
Human Skin
- The color of human skin is created by a combination of blood (red) and melanin (yellow, brown).
- Skin colors lie between these two extreme hues and are somewhat saturated.
- The human skin is a fraction of the actual color cube, about 0.25 % of the total colors
- Except for extremely hairy subjects, which are rare, skin has only low-amplitude texture.
Problem statement
- What we need is a function which can tell whether a given color pixel is a skin pixel or not

- 0 : Input pixel is not a skin pixel
- 1 : Input pixel is a skin pixel
Skin detection techniques
-
Involves the formulation of an efficient mathematical model to represent the skin color distribution.
- Range based
- transform a given pixel into an appropriate color space
- skin classifier to label the pixel whether it is a skin or non skin pixel.
- Histogram backprojection
- histogram is a spectrum of intensity repartition. A list that contains the number of pixels for each possible value of pixel.
RGB vs HSV vs YCrCb Color Space
- RGB: (Red-Green-Blue)
- Defined in relation to primary colors(like CMYK).
- Not much useful for skin detection
- HSV: (Hue-Saturation-Value)
- Defined in a way that is similar to how humans perceive color.
- YCrCb: (Luminance-Chrominance)
- Encoded nonlinear RGB signal, commonly used in video coding and image compression work.
- Widely used since the skin pixels form a compact cluster in the Cb-Cr plane.
HSV Color Space
- Hue is the color portion of the color model, and is expressed as a number from 0 to 360 degrees. 0-180 in OpenCV. Defines the dominant color [R,Y,G,C,B,M]
- Saturation is the amount of gray in the color, from 0 to 100 percent.
- Value works in conjunction with saturation and describes the brightness or intensity of the color, from 0-100 percent.
# Required modules
import cv2
import numpy as np
import matplotlib.pyplot as plt
min_HSV = np.array([0, 58, 30], dtype = "uint8")
max_HSV = np.array([33, 255, 255], dtype = "uint8")
# Get pointer to video frames from primary device
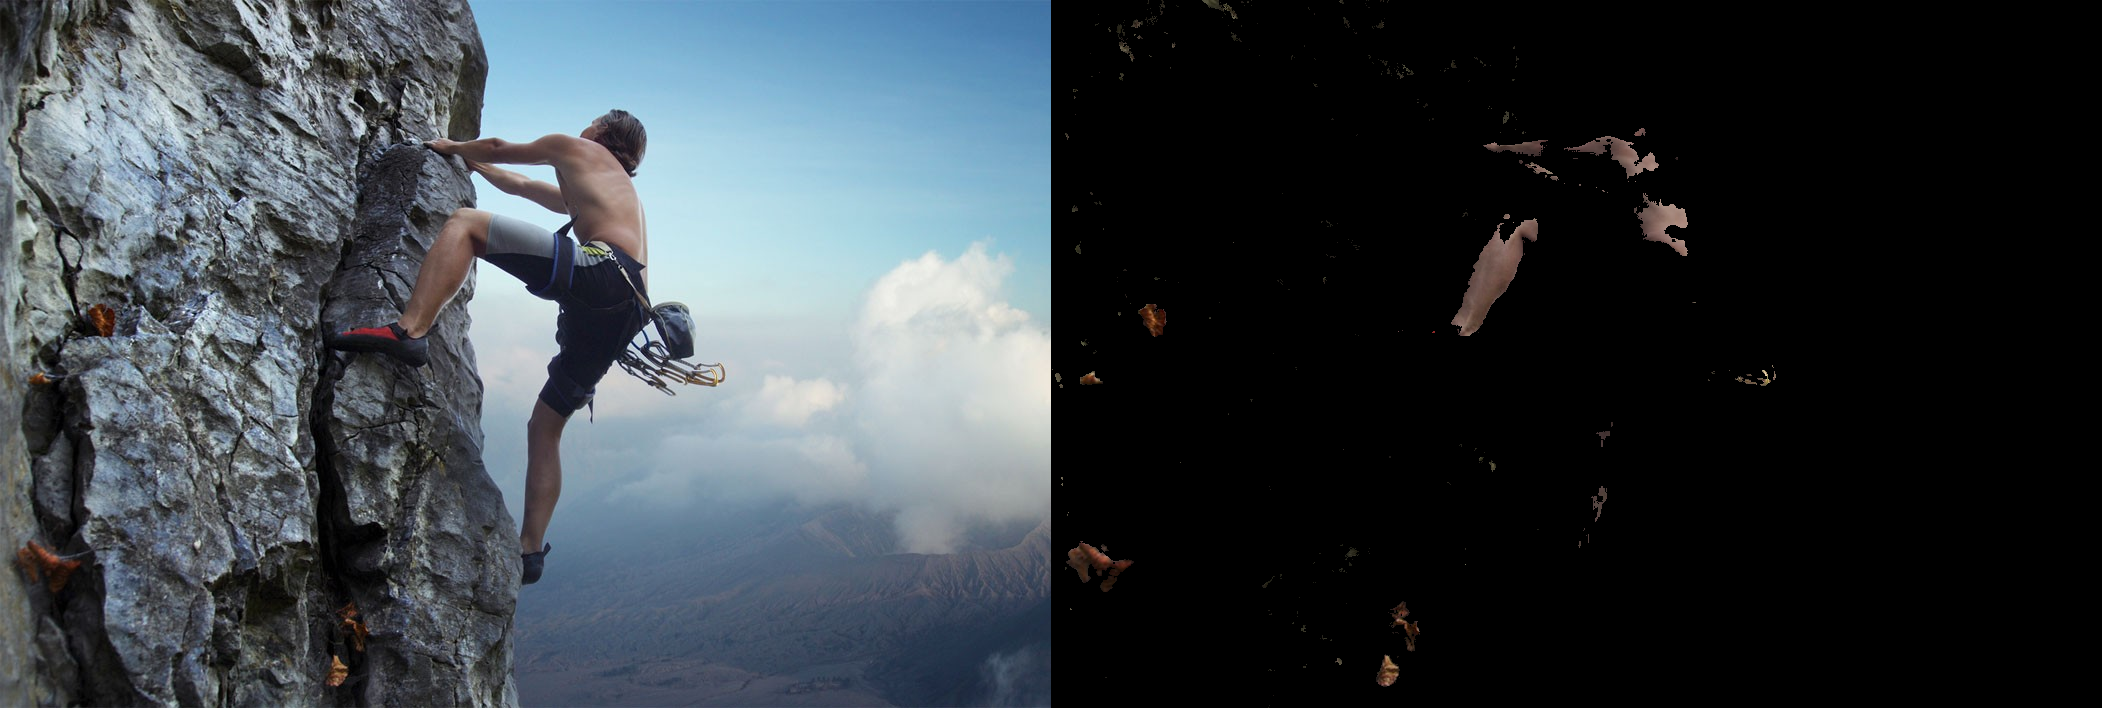
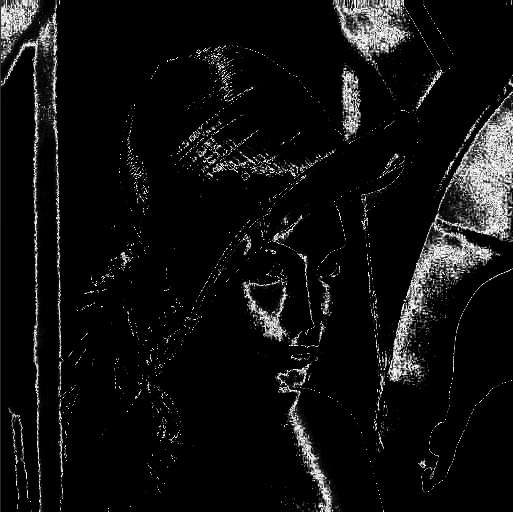
image = cv2.imread("/assets/img/skin-detection/rock.jpg")
imageHSV = cv2.cvtColor(image, cv2.COLOR_BGR2HSV)
skinRegionHSV = cv2.inRange(imageHSV, min_HSV, max_HSV)
skinHSV = cv2.bitwise_and(image, image, mask = skinRegionHSV)
cv2.imwrite("/assets/img/skin-detection/hsv.png", np.hstack([image, skinHSV]))
YCrCb Color Space
- Encoded nonlinear RGB signal, commonly used in video coding and image compression work.
- constructed as a weighted sum of the RGB values, and two color difference values Cr and Cb that are formed by subtracting luma from RGB red and blue components
- 16 to 235 for Y, 16 to 240 for Cb and Cr
- Skin pixels form a compact cluster in the Cb-Cr plane.
Transformation simplicity and explicit separation of luminance and chrominance components makes this colorspace attractive for skin color modelling
# Required modules
import cv2
import numpy as np
import matplotlib.pyplot as plt
min_YCrCb = np.array([0,133,77],np.uint8)
max_YCrCb = np.array([235,173,127],np.uint8)
# Get pointer to video frames from primary device
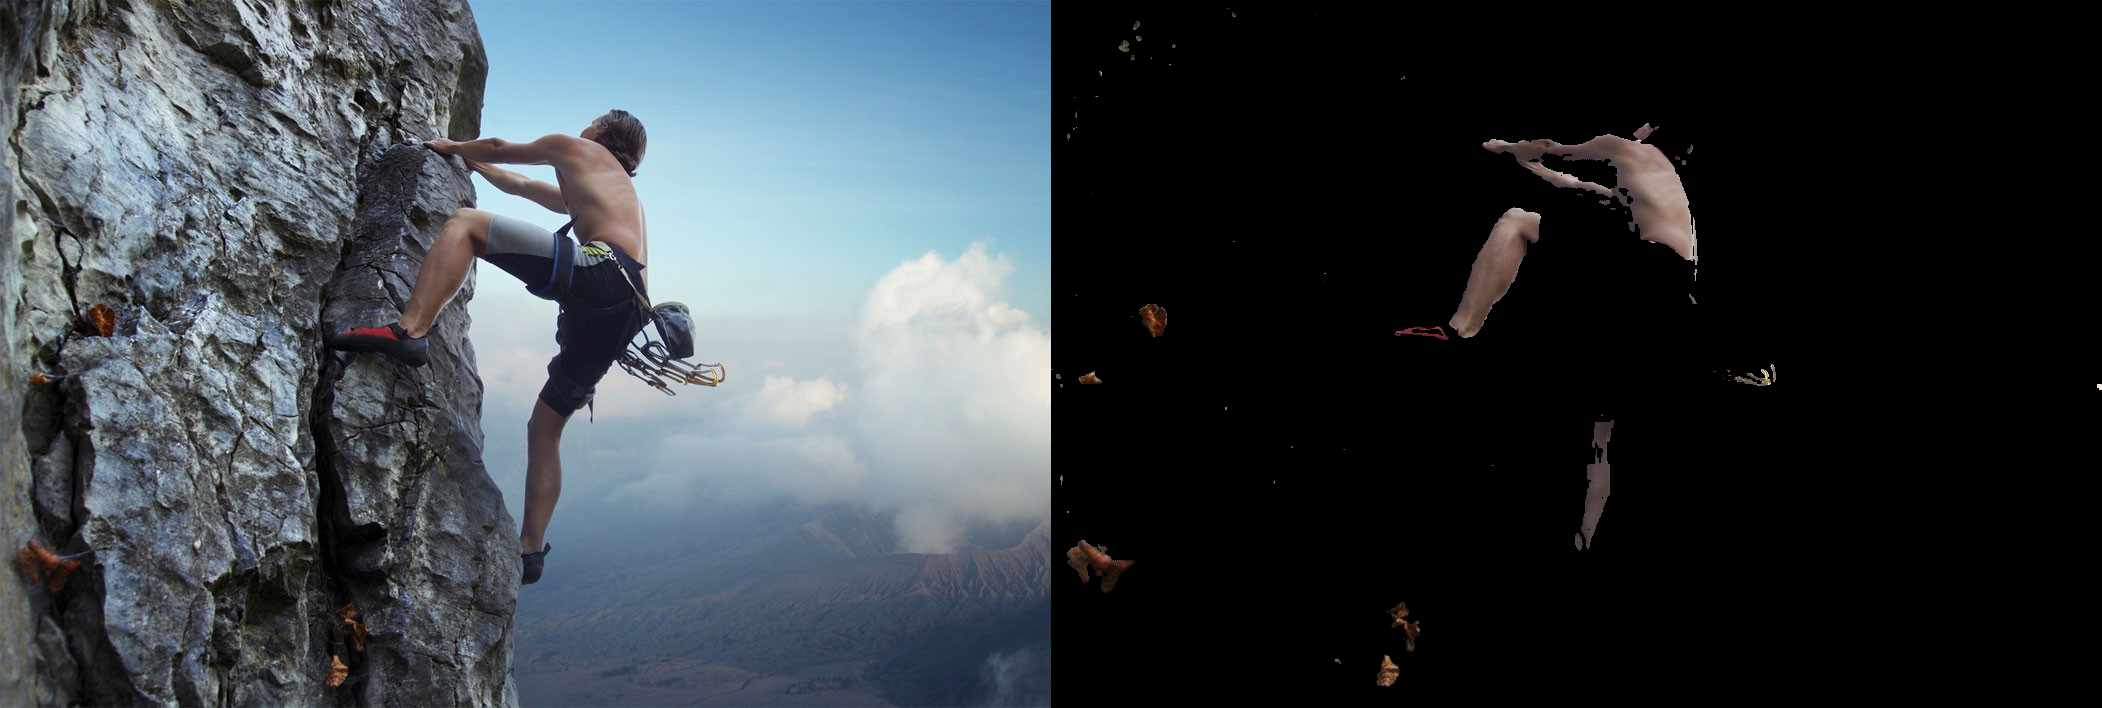
image = cv2.imread("/assets/img/skin-detection/rock.jpg")
imageYCrCb = cv2.cvtColor(image,cv2.COLOR_BGR2YCR_CB)
skinRegionYCrCb = cv2.inRange(imageYCrCb,min_YCrCb,max_YCrCb)
skinYCrCb = cv2.bitwise_and(image, image, mask = skinRegionYCrCb)
cv2.imwrite("/assets/img/skin-detection/ycrcb.png", np.hstack([image,skinYCrCb]))
Histogram Calculation
- OpenCV
cv2.calcHist(images, channels, mask, histSize, ranges)- images : surce image of type uint8 or float32.
- channels : Index of channel for which we calculate histogram.
- mask : mask image. To find histogram of full image, it is given as “None”.
- histSize : this represents our BIN count. For full scale, we pass [256].
- ranges : this is our RANGE. Normally, it is [0,256].
- Numpy
hist,bins = np.histogram(img.ravel(),256,[0,256])
**OpenCV function is faster than (around 40X) than np.histogram(). So stick with OpenCV function.**
# HSV Color-Space Histogram
color = ('r','g','b')
for i,col in enumerate(color):
    histr = cv2.calcHist([skinHSV],[i],None,[256],[0,256])
    plt.plot(histr,color = col)
    plt.xlim([0,256])
    plt.ylim([0,500])
plt.show()

# YCrCb Color-Space Histogram
color = ('r','g','b')
for i,col in enumerate(color):
    histr = cv2.calcHist([skinYCrCb],[i],None,[256],[0,256])
    plt.plot(histr,color = col)
    plt.xlim([0,256])
    plt.ylim([0,500])
plt.show()

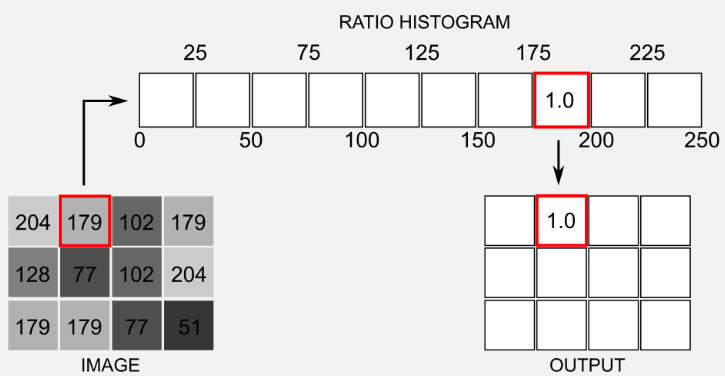
Histogram Backprojection
- Original algorithm was proposed by Swain and Ballard in their article “Color Indexing” in 1991.
- Backprojection answers to the question “Where in the image are the colors that belong to the object being looked for (the target)?”
- Given the image histogram I and the model histogram M, we define a ratio histogram R as: $R_i = min(\frac{M_i}{I_i},1)$
- function h(c) maps color c of the pixel at (x,y) to the value of the histogram R it indices.
- In other words, function h(c) backprojects the histogram R onto the input image.
- The backprojected image B is then convolved with a disk D of radius r.
But how can it be really useful ?
- We can calculate the histogram of an area on a frame, then the same area on another frame from another point of view is more likely to have the same histogram.
def convolve(B, r):
D = cv2.getStructuringElement(cv2.MORPH_ELLIPSE,(r,r))
cv2.filter2D(B, -1, D, B)
return B
#Loading the image and converting to HSV
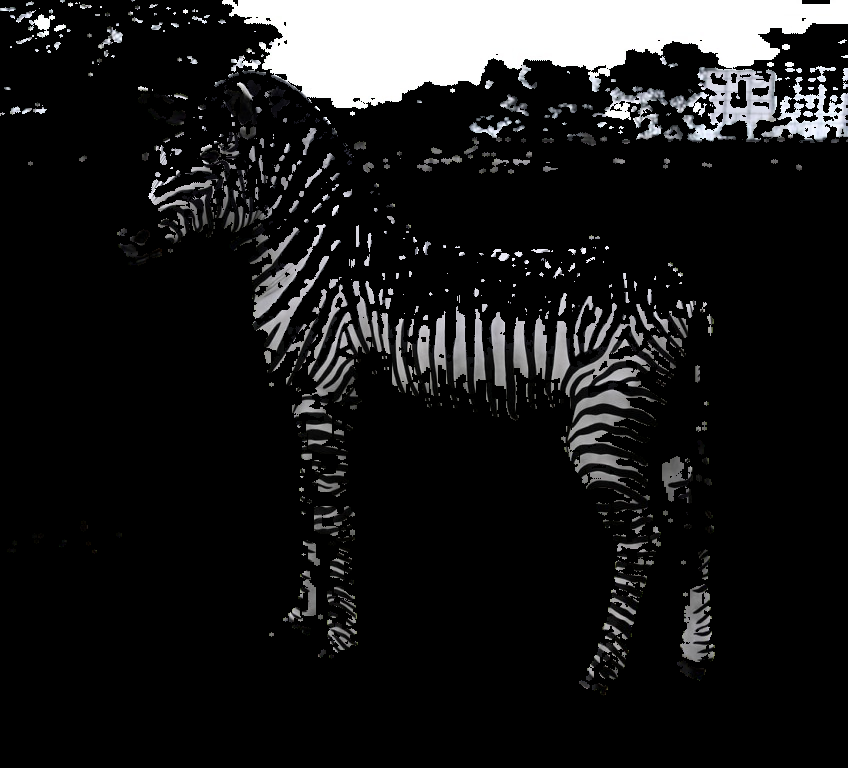
image = cv2.imread('/assets/img/skin-detection/zebra1.jpg')
image_hsv = cv2.cvtColor(image,cv2.COLOR_BGR2HSV)
model_hsv = image_hsv[225:275,625:675] # Select ROI
#Get the model histogram M
M = cv2.calcHist([model_hsv], channels=[0, 1], mask=None,
histSize=[80, 256], ranges=[0, 180, 0, 256] )
#Backprojection of our original image using the model histogram M
B = cv2.calcBackProject([image_hsv], channels=[0,1], hist=M,
ranges=[0,180,0,256], scale=1)
B = convolve(B, r=5)
#Threshold to clean the image and merging to three-channels
_, thresh = cv2.threshold(B, 30, 255, cv2.THRESH_BINARY)
cv2.imwrite("/assets/img/skin-detection/roi.png",cv2.cvtColor(model_hsv,cv2.COLOR_HSV2RGB))
cv2.imwrite("/assets/img/skin-detection/backprojection1.png",cv2.bitwise_and(image,image, mask = thresh))
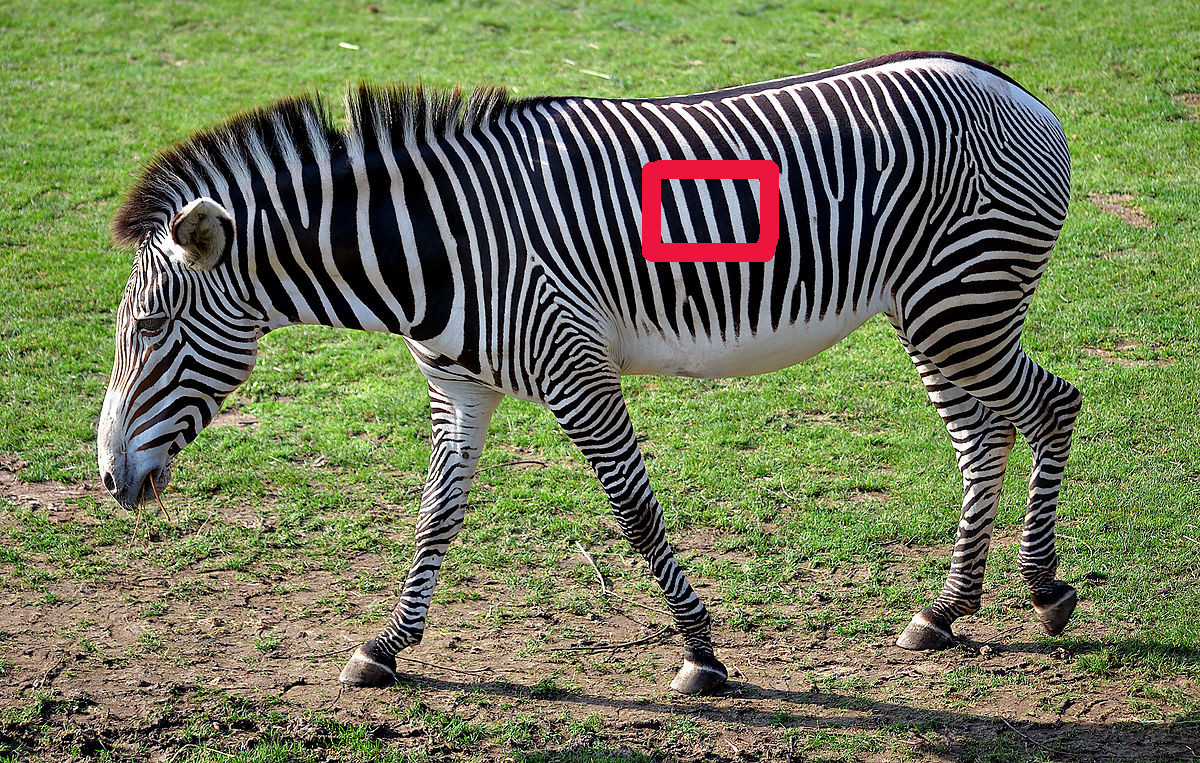


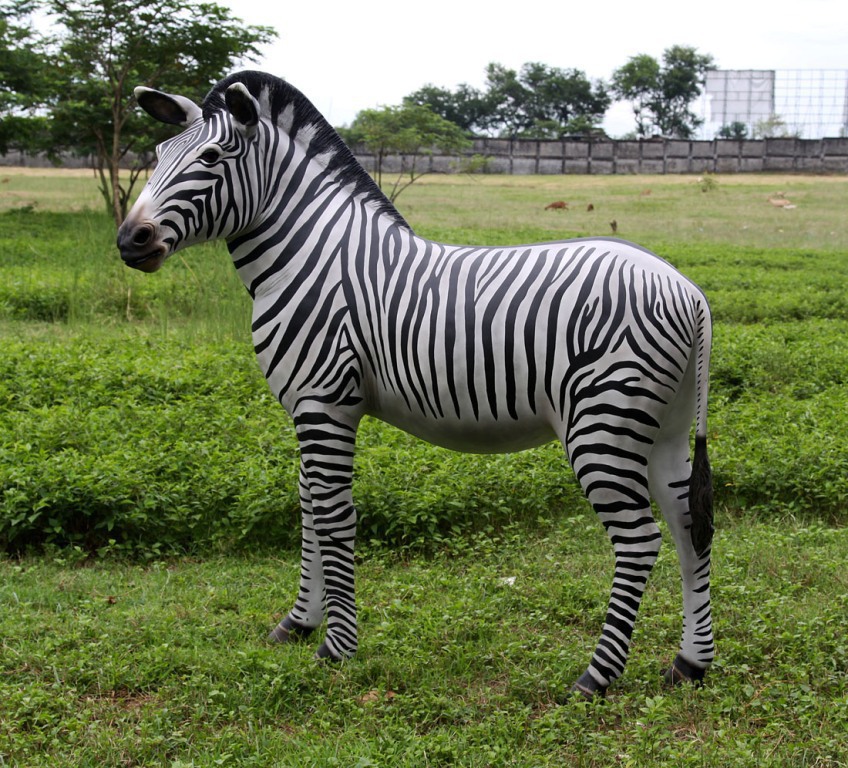
image2 = cv2.imread('/assets/img/skin-detection/zebra2.jpg')
image_hsv2 = cv2.cvtColor(image2,cv2.COLOR_BGR2HSV)

#Backprojection on new image using the same model histogram M
B = cv2.calcBackProject([image_hsv2], channels=[0,1], hist=M,
                         ranges=[0,180,0,256], scale=1)

B = convolve(B, r=5)

#Threshold to clean the image and merging to three-channels
_, thresh = cv2.threshold(B, 30, 255, cv2.THRESH_BINARY)

#Using B_tresh as a mask for a binary AND with the original image
cv2.imwrite("/assets/img/skin-detection/backprojection2.png",cv2.bitwise_and(image2,image2, mask = thresh))
OpenCV
Class CvAdaptiveSkinDetector
-
Constructor and Destructor


-
Member Functions


Not available in OpenCV 3.x.x
Why was CvAdaptiveSkinDetector removed from OpenCV 3.x.x ?
IRC #opencv
Pros
- Range of colors based skin detection is invariant to orientation and size and is fast to process.
- Useful as a pre-processing step
Cons
- Most of the techniques report about 95% true detection.
- False detection rates varies from 15 to 30%
- Not useful with gray-scale, infrared, or other types of image modalities that do not contain color information. (Regardless of the choice of the color space and the classification method)
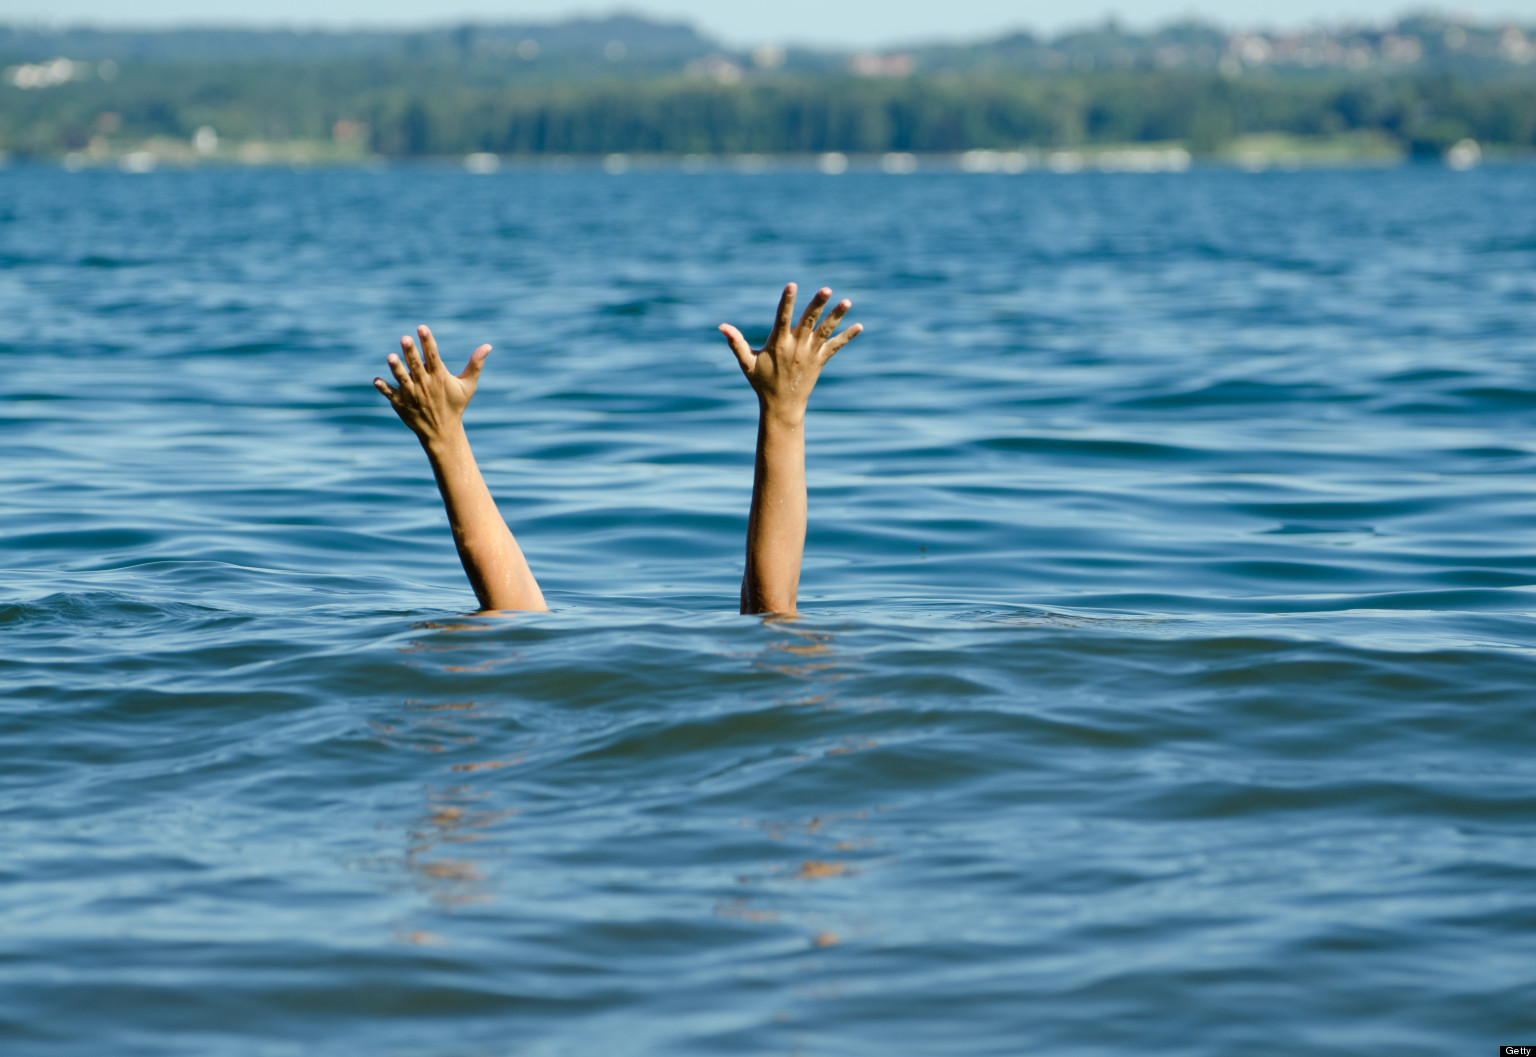
Applications
Gesture tracking, Life saving, Pokedex, Games

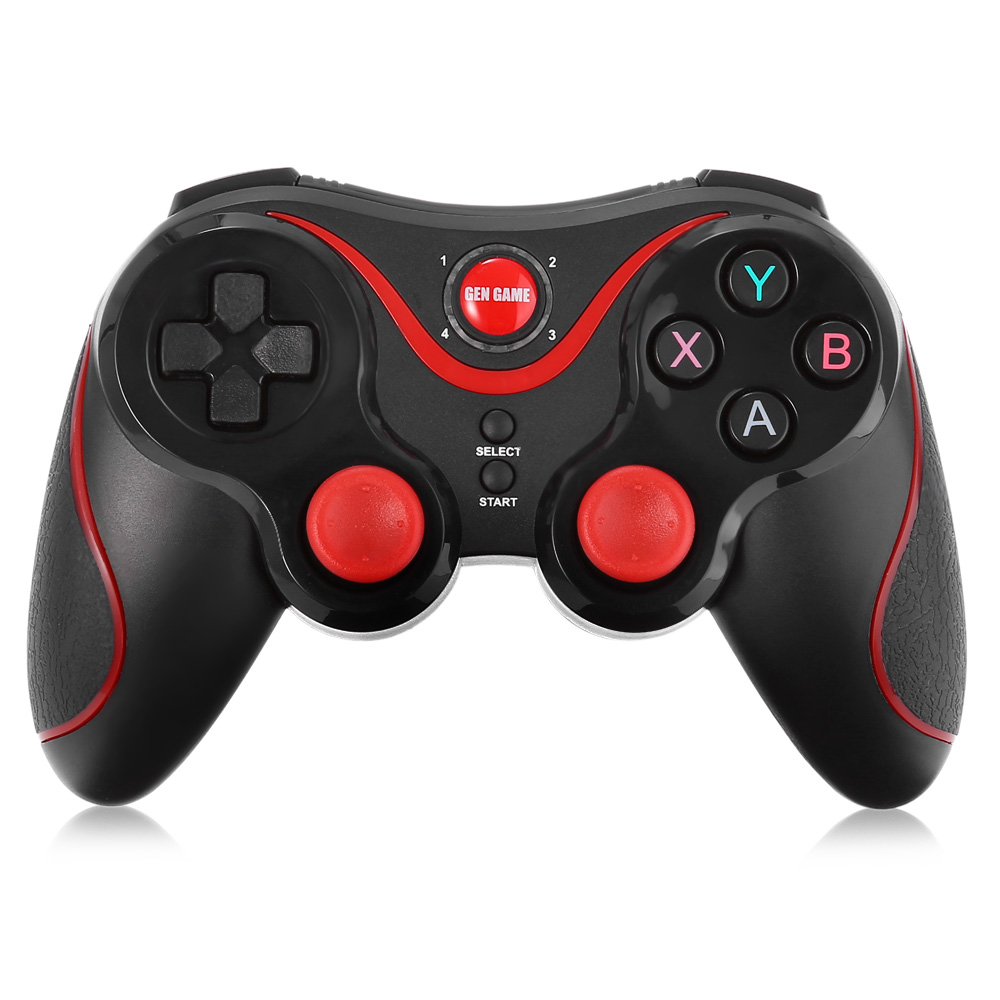
Human skin as a game controller
# Required moduls
import cv2
import numpy
from pykeyboard import PyKeyboard

# Constants for finding range of skin color in YCrCb
min_YCrCb = numpy.array([0,133,77],numpy.uint8)
max_YCrCb = numpy.array([255,173,127],numpy.uint8)

font = cv2.FONT_HERSHEY_SIMPLEX
gameflag = False
keyboard = PyKeyboard()

# Create a window to display the camera feed
cv2.namedWindow('Camera Output')

# Get pointer to video frames from primary device
videoFrame = cv2.VideoCapture(0)

while True: # any key pressed has a value >= 0

    # Grab video frame, decode it and return next video frame
    readSucsess, sourceImage = videoFrame.read()
    sourceImage = cv2.flip(sourceImage, 1)

    # Convert image to YCrCb
    imageYCrCb = cv2.cvtColor(sourceImage,cv2.COLOR_BGR2YCR_CB)

    # Find region with skin tone in YCrCb image
    skinRegion = cv2.inRange(imageYCrCb,min_YCrCb,max_YCrCb)

    skin = cv2.bitwise_and(sourceImage, sourceImage, mask = skinRegion)

    # Do contour detection on skin region
    im2, contours, hierarchy = cv2.findContours(skinRegion, cv2.RETR_EXTERNAL, cv2.CHAIN_APPROX_SIMPLE)
    cv2.rectangle(skin,(0,300),(640,200),(0,0,255),3)
    if len(contours) != 0:
        contour = max(contours, key = cv2.contourArea)
        M = cv2.moments(contour)
        if(M["m00"] != 0):
            cx = int(M["m10"]/M["m00"])
            cy = int(M["m01"]/M["m00"])
            area = M["m00"]
            if cy < 200:
                cv2.circle(skin, (cx, cy), 7, (0, 255, 0), -1)
                if gameflag:
                    keyboard.press_key(' ')
                    keyboard.release_key(' ')
            elif cy > 300:
                cv2.circle(skin, (cx, cy), 7, (255, 0, 0), -1)
                if gameflag:
                    keyboard.press_key('Down')
                    keyboard.release_key('Down')
            else:
                cv2.circle(skin, (cx, cy), 7, (255, 255, 255), -1)
                gameflag = True


    # Display the source image
    cv2.imshow('Camera Output',skin)

    # Check for user input to close program
    if cv2.waitKey(5) == 27: # wait 5 millisecond in each iteration of while loop
        break

# Close window and camera after exiting the while loop
cv2.destroyWindow('Camera Output')
videoFrame.release()
Here’s a modified version of the classic t-rex game from chrome offline err page. I used my own skin as a game controller.
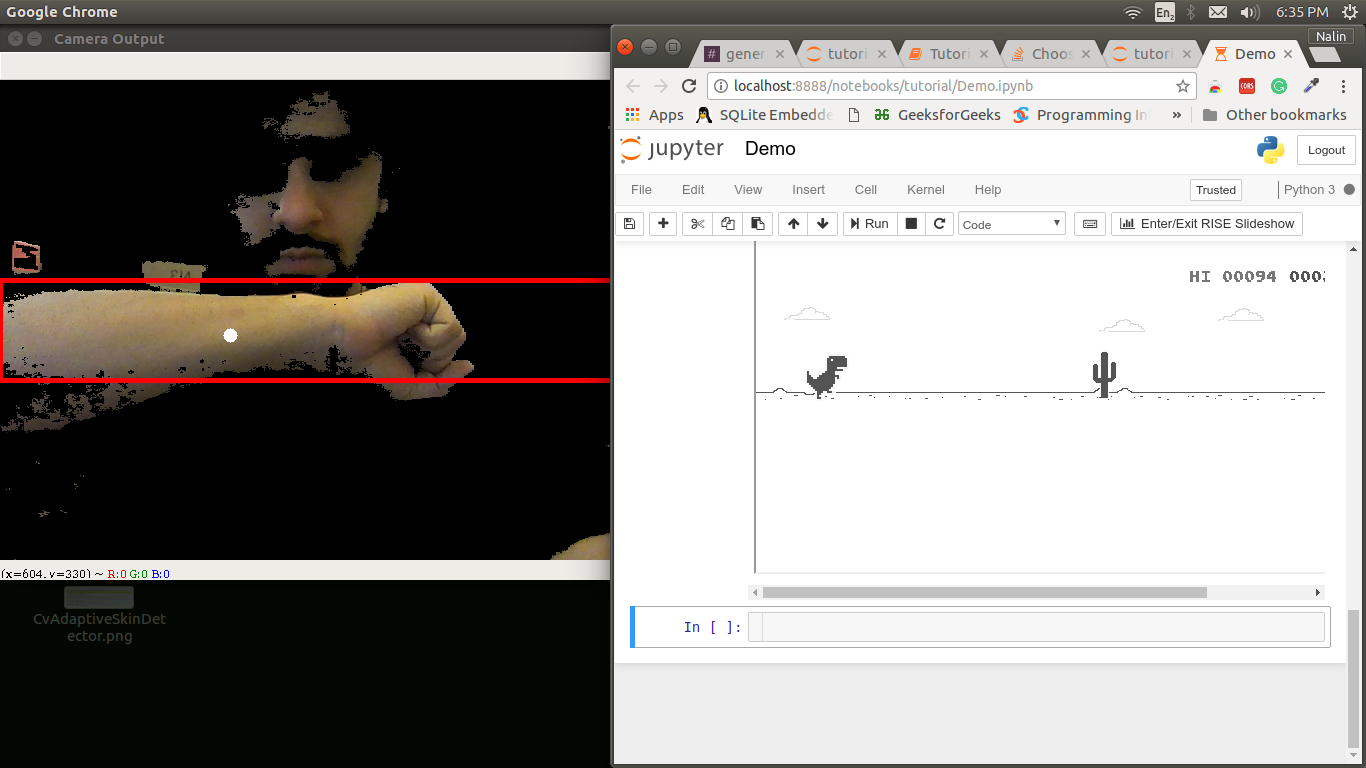
Watch the demo below.